Introduction
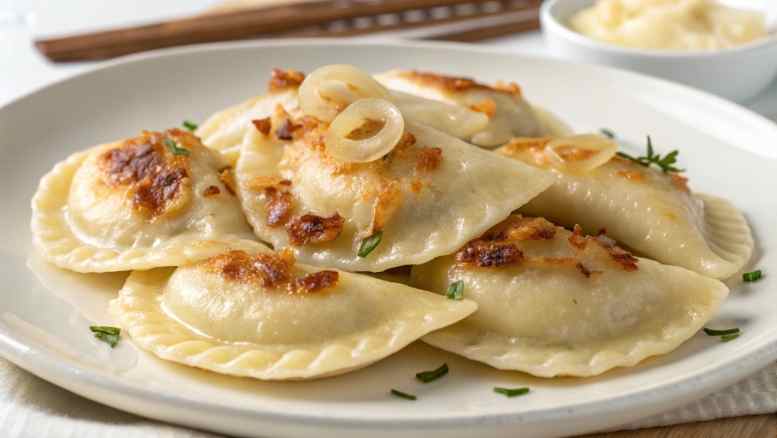
The best homemade pierogi are tender, pillowy dumplings filled with creamy mashed potatoes and cheese, then boiled and finished in butter for irresistible comfort. This classic Eastern European staple delivers a perfect balance of soft dough, rich filling, and golden edges when pan-fried. Made from scratch, pierogi are deeply satisfying, freezer-friendly, and ideal for family meals, holidays, or cozy weekends when comfort food is non-negotiable.
Why you’ll love this recipe
- Soft, tender dough that’s easy to roll
- Creamy potato-cheese filling with rich flavor
- Boil-and-fry method for perfect texture
- Freezer-friendly and great for meal prep
- Crowd-pleasing comfort food
Ingredients (serves 4–6; about 40 perogies)
Dough
- 3 cups (375 g) all-purpose flour
- 1 tsp salt
- 1 large egg
- ¾ cup (180 ml) warm water
- 2 tbsp sour cream or oil (for tenderness)
Filling
- 2 cups mashed potatoes (cooled)
- 1 cup shredded sharp cheddar or farmer’s cheese
- 2 tbsp butter
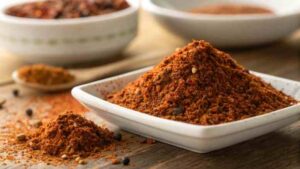
- Salt and black pepper to taste
For Cooking
- Salted water (for boiling)
- 3 tbsp butter
- 1 small onion, thinly sliced (optional)
Essential Tools and Equipment
- Large mixing bowl
- Rolling pin
- Round cutter or glass
- Fork
- Large pot
- Skillet
- Slotted spoon
Step-by-step process (detailed)
1. Make the dough
In a large bowl, whisk flour and salt. Add egg, warm water, and sour cream (or oil). Mix until a shaggy dough forms, then knead 5–7 minutes until smooth and elastic. The dough should be soft and supple, not sticky. Cover and rest for 30 minutes to relax the gluten.
2. Prepare the filling
In a bowl, combine cooled mashed potatoes, cheese, butter, salt, and pepper. Mix until smooth and creamy. Taste and adjust seasoning. The filling should be thick and scoopable, not loose.
3. Roll the dough
Divide the rested dough in half. Roll one portion on a lightly floured surface to about ⅛-inch thickness. Keep the remaining dough covered to prevent drying.
4. Cut the rounds
Use a round cutter or a glass (approximately 3 inches in diameter) to cut circles. Gather scraps, re-roll once, and cut more rounds.
5. Fill the perogies
Place 1–1½ teaspoons filling in the center of each round. Avoid overfilling. Lightly moisten edges with water if dry.
6. Seal properly
Fold the dough over the filling to form a half-moon. Press edges firmly, then crimp with a fork to seal. A tight seal prevents filling leaks during boiling.
7. Boil gently
Bring a large pot of well-salted water to a gentle boil. Add perogies in batches. When they float, cook 1–2 minutes more, then remove with a slotted spoon.
8. Pan-fry for flavor
Melt butter in a skillet over medium heat. Add sliced onions if using and cook until golden. Add boiled pierogi and fry 2–3 minutes per side until lightly crisp and golden.
9. Serve hot
Serve immediately with extra butter, sour cream, or fresh herbs.
Mistakes to avoid
- Skipping dough rest — tough, elastic dough
- Overfilling — bursts during boiling
- Rolling too thick — dense texture
- Rapid boiling — torn perogies
- Frying without boiling — raw dough inside
Variations of Best Homemade Perogies
- Classic Potato & Onion — add sautéed onions to filling
- Cheese-Only — farmer’s cheese with butter and salt
- Bacon Perogies — add crisp bacon bits to filling
- Sauerkraut — tangy cabbage filling
- Sweet Perogies — sweetened cheese with fruit
Tips for storage & make-ahead
- Freeze uncooked pierogi on trays, then bag up to 3 months
- Boil directly from frozen; add 1–2 extra minutes
- Refrigerate cooked pierogi up to 3 days
- Reheat by pan-frying in butter
Frequently Asked Questions
Can I freeze them before cooking?
Yes. Freeze uncooked for better texture and convenience.
Why did my perogies open while boiling?
Edges weren’t sealed tightly or were overfilled.
Do I have to fry them after boiling?
Not required, but highly recommended for flavor.
What dough texture is correct?
Soft and smooth, similar to pasta dough but more tender.
Conclusion
Best Homemade Perogies are the definition of comfort—tender dough, creamy filling, and buttery finish that never fails to satisfy. While they take a little time, the process is simple and deeply rewarding, especially when you stock the freezer for future meals. Master this recipe once, and homemade pierogi become a tradition worth repeating.
Best Homemade Perogies
Ingredients
- Dough
- 3 cups 375 g all-purpose flour
- 1 tsp salt
- 1 large egg
- ¾ cup 180 ml warm water
- 2 tbsp sour cream or oil for tenderness
- Filling
- 2 cups mashed potatoes cooled
- 1 cup shredded sharp cheddar or farmer’s cheese
- 2 tbsp butter
- Salt and black pepper to taste
- For Cooking
- Salted water for boiling
- 3 tbsp butter
- 1 small onion thinly sliced (optional)
Instructions
- Make and rest dough.
- Prepare creamy filling.
- Roll, fill, and seal perogies.
- Boil until floating, then pan-fry in butter.
Notes
- Resting the dough is essential
- Don’t overfill
- Freeze uncooked for later
- Pan-frying adds the best flavor